
Friday, 18 May 2012
Unit Summary/Discussing the Brief
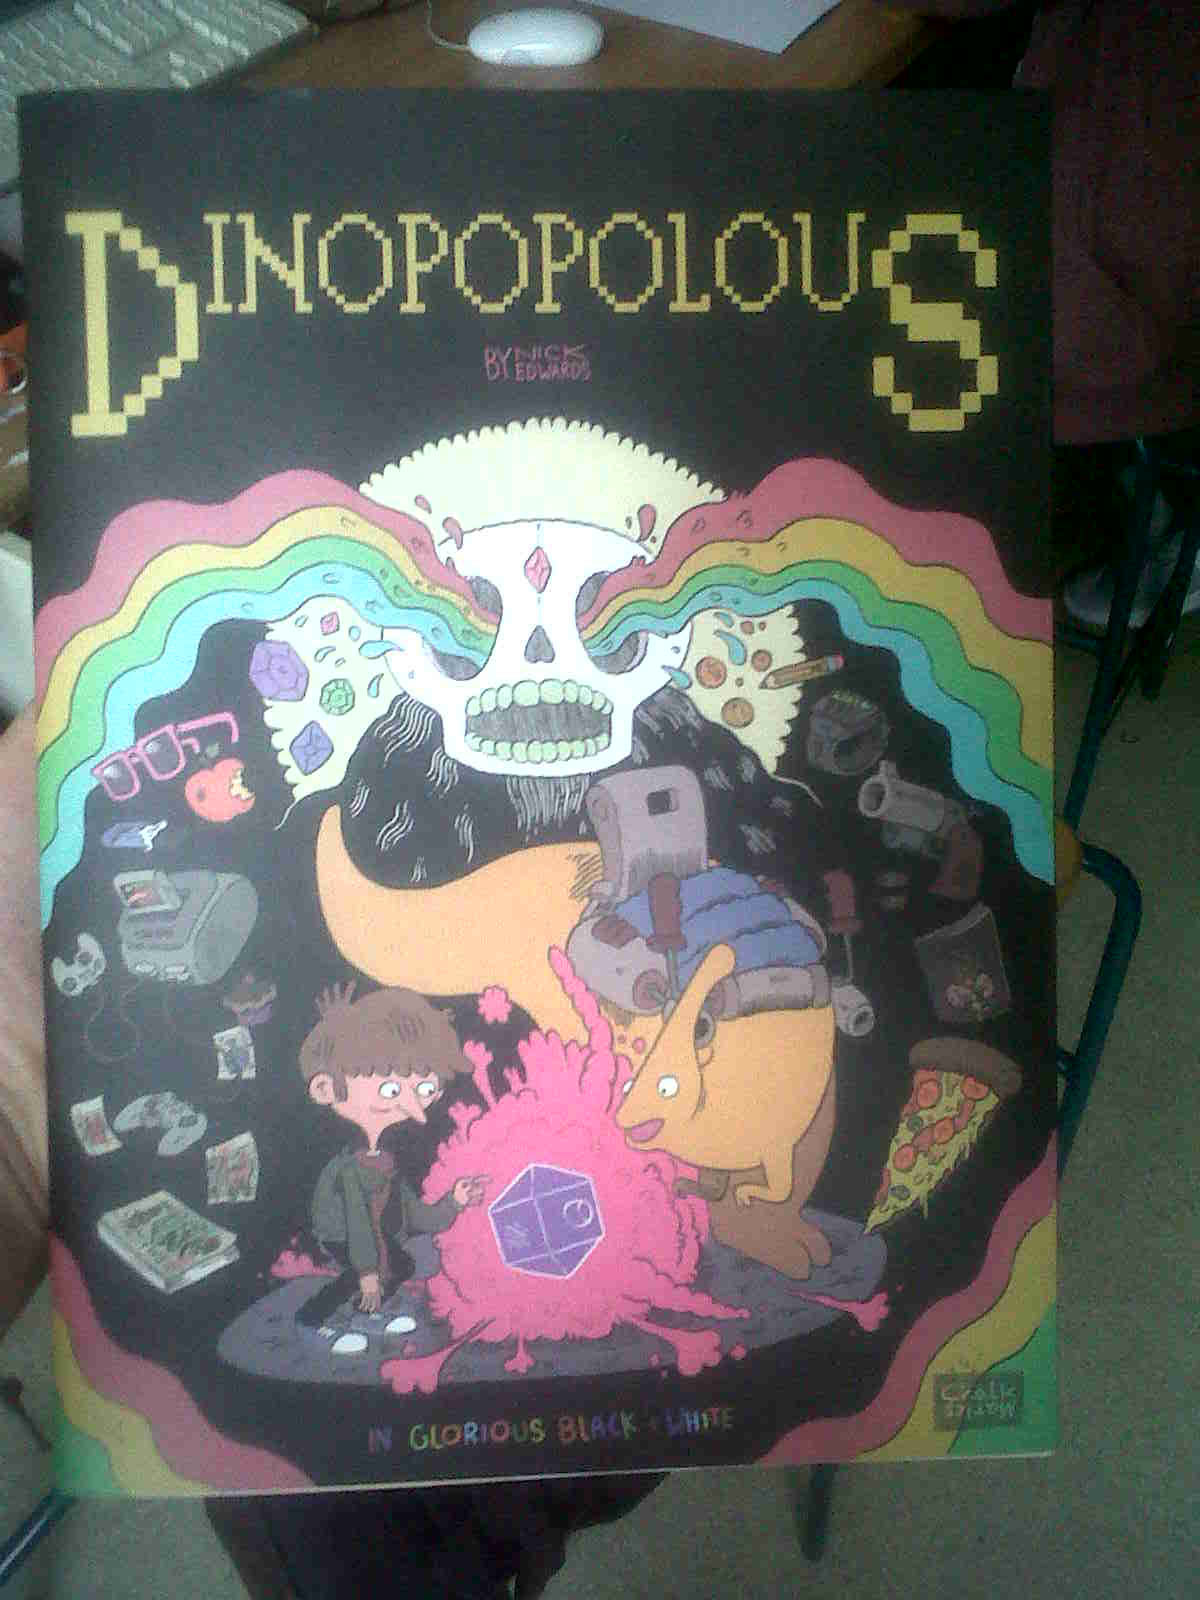
The main exam topic I was given at the start of this unit was meetings and experiences so I immediately began brainstorming and came up with a number of ideas to do with people/places which I thought a meeting between would be interesting. I then decided on doing a pirates map because of the meeting between pirates and treasure. After doing research of pirates and looking at artists who have used similar ideas, I found a piece of work by Nick Edwards called Dinopopolous. This gave me the idea to produce the map as a set of end pages for a book about pirates who get sucked into a whirlpool and end up on a foreign planet. The book also had a slip cover over the end pages so I decided to produce one of these as well. I then went on to develop my ideas and experiment with a variety of techniques which I was hoping to use in the two pieces I hoped to produce for my final.
Thursday, 17 May 2012


Wednesday, 16 May 2012

Tuesday, 15 May 2012
Photos of Subject Matter


This is the cover of Nick Edwards' Dinopopolous, it gave me the idea to put my map onto the cover of a book under the slip cover. As you can see in the pictures this piece is also underneath the slip cover.
Monday, 14 May 2012

Sunday, 13 May 2012

Saturday, 12 May 2012
Paraphernalia

All the things that first came to my mind when i thought of pirates and treasure maps.
Friday, 11 May 2012


Thursday, 10 May 2012
Artist Copy - Brian Biggs

This is the piece of work I have chosen to copy from this particular artist.

I started by drawing the outline and most of the black sections of the piece. This picture shows me part way through the process.

This is what I used for the sky in the background of the piece, I used water colours and a huge brush to do this, then I scanned it in and did a colour overlay and played about with it until it looked right.

This screenshot shows my work in photoshop after I had scanned it in and coloured it, added the sky and edited that. You can see the different layers I used in the right hand side of the image.

And this is what it looked like when I was done.
Wednesday, 9 May 2012
Case Study - Nick Edwards

This is a piece of Nick Edwards' work which I wrote a case study on. The writing for this is spread across the two images below.


Tuesday, 8 May 2012
Experiment 1 - Monoprint - Nick Edwards

I started by drawing a character from Nick Edwards' Dinopopolous in pencil

Then I rolled ink thinly onto a flat surface and drew over the entire picture so that the places where the pencil had pressed were pressed onto the ink and this was the result.
Monday, 7 May 2012
Artist Copy - Nick Edwards
This is the piece I chose to copy, it is the front cover of Dinopopolous.

I started by drawing out the outline of the piece using pencil.

This is a screenshot showing me part of the way through colouring in my piece.

This is another screenshot of the piece when it is nearly finished.

The Finished piece, oooooh, ahhhhhhh!
Sunday, 6 May 2012
Experiment 2 - Intaglio - Gipi Emulation

This is the acetate sheet I made for an intaglio from my own design but in the style of Gippi.

This is a photo showing me working on my acetate, here it has been completely inked up and is ready to print with.

This is the first print I did from my design. It includes mainly black and white tones so I'm treating it as a kind of trail piece.

This is what I got when I added some mid-tones to my acetate. I am really happy with the result, I think it's striking and follows a very similar style to Gipi. I was very much inspired by Gipi to produce this piece. His influence in my work shows through the messy, scratchy style of line which was achieved using the intaglio process. Overall I think looking at Gipi's work helped me to produce a piece that has many aspects of his work without looking like an exact copy because of careful research into how he produced his work which enabled me to work in his style but completely use my own ideas.
Artist Copy - Gipi

This is the acetate sheet I used for my intaglio. I made it using a compass and a photocopy of the original piece.

This is the first print I did using my acetate. I have done it using black ink because this is what the outline of the original piece is done in.

This is a little experiment I did using coloured ink on my acetate sheet. I wanted to see if I could manage to use a range of colours and blend them well from one to another. I felt I needed to do this incase I wanted to use this in my final piece which will be in full colour. I think it worked out well but it is not true to the original so I'm going to stick with the black one.

This is what I used for the colour of the piece, it is a water colour painting i did by copying the colours of the original.

I then combined the two pieces of work together in photoshop to produce my best efforts of copying the original.If I was to have more time I would dull down the outline because it is a bit too bold and striking in contrast with the rest of the work.

And this is what it should of looked like.
Saturday, 5 May 2012
Thumbnails
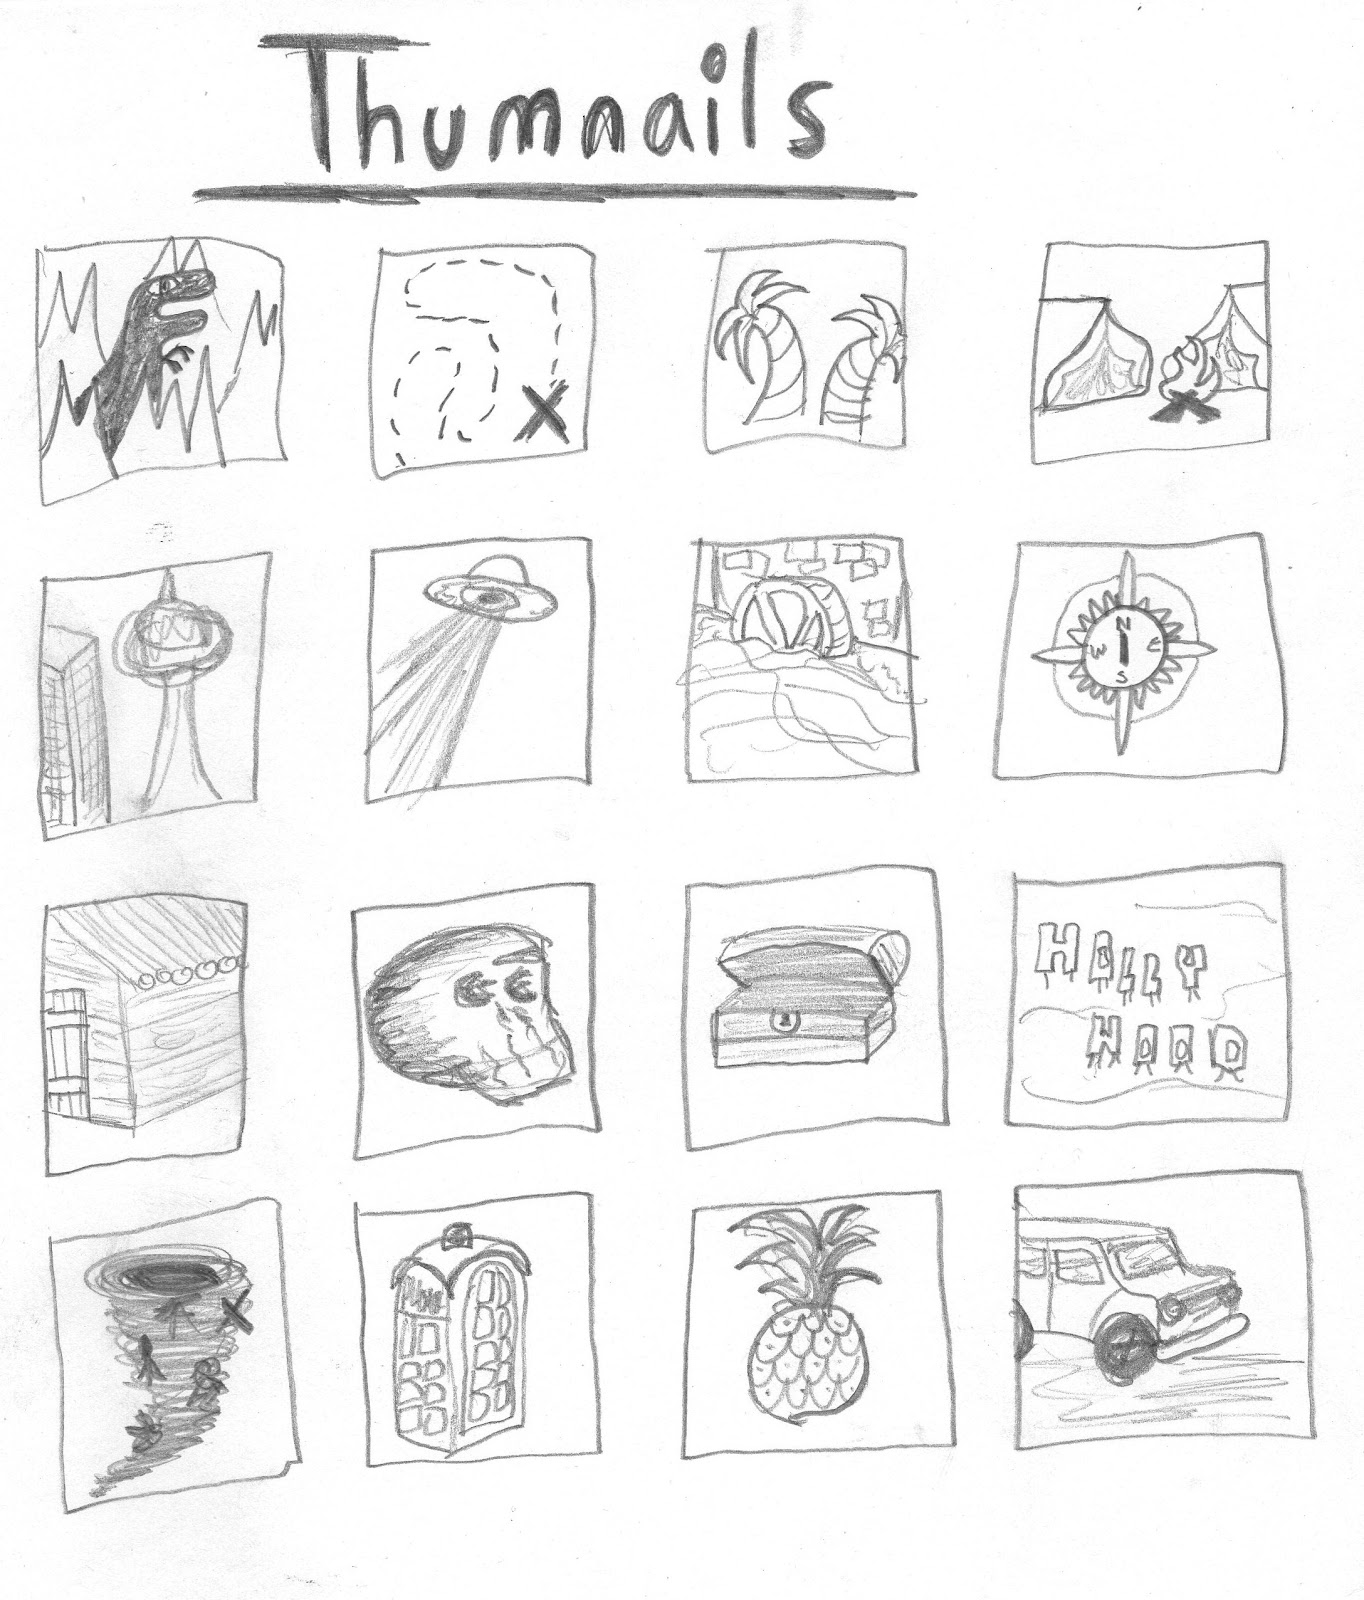
These are thumbnail drawings of different locations that are going to be on my map, they are mainly landmarks and different things the pirates may come across on their search.
Friday, 4 May 2012
Final Draft - End Pages

This is a final draft I made before I began work on my final piece. I have used the drawings for my final piece so a picture of those will be included in a later post, but basically I drew a few locations and scanned them in and put them on the map paper I made.
Thursday, 3 May 2012
Final Draft - Book Cover


Wednesday, 2 May 2012
Final Piece Process

This is the paper I made for my map, I tea stained it and then burnt the edges slightly along with parts of the page. For extra effect I sprayed a bit of watercolour on top of this using a toothbrush.

These are the first set of drawings for the locations on my may. I drew them using fineliner.

And this is the second set, also drawn using fineliner.

I then proceeded to colour my drawings using photoshop, this is the first set after they had been coloured and I did the same for the second set.
This is a screenshot to show me colouring the drawings in photoshop.

This is another screen shot showing me combining the map page I made with the drawings once they were coloured.
Tuesday, 1 May 2012
Final Piece

This is the design for a slip cover I made for part of my final piece. I put it together completely in photoshop using the tools available alongside my own drawings and digital text. It is one of two pieces for a book which is explained later in this post. The book will be for children around the ages of 5-10. This is why I have used a similar style to Nick Edwards with the simple drawings and bold block colours which were added in photoshop.
.jpg)
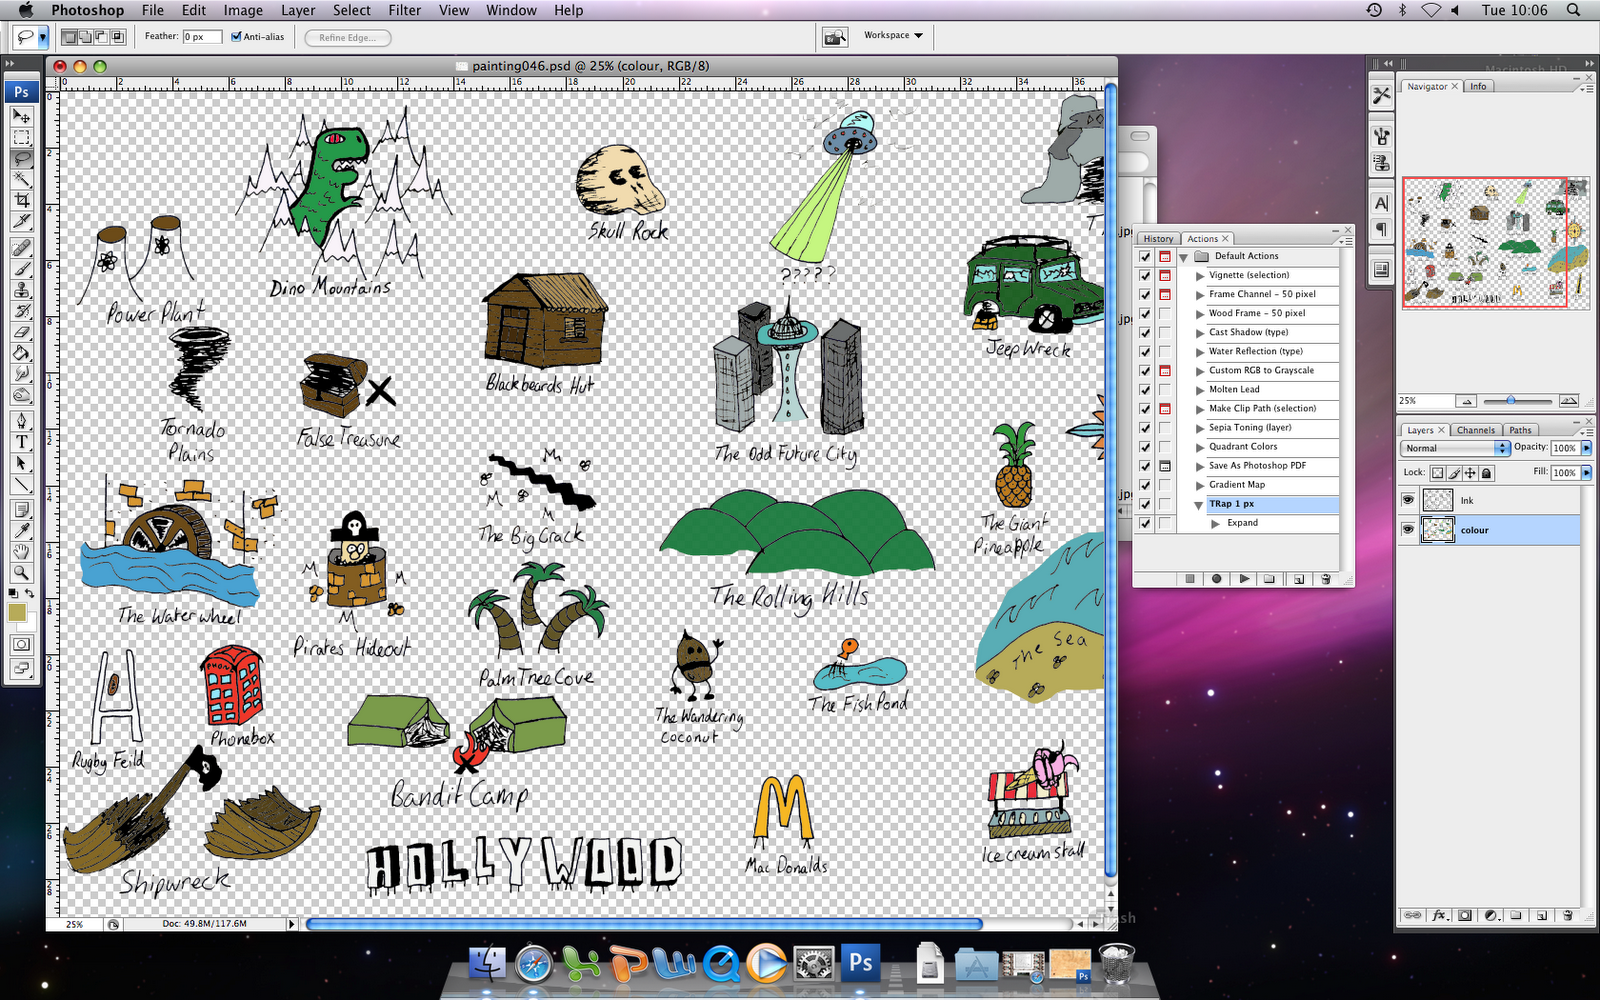
This is the other part of my final piece. It is a treasure map that is supposed to go underneath the slip cover of a book about a gang of pirates who go looking for treasure, get sucked into a whirlpool and end up on a foreign planet. This explains the meeting of futuristic locations with old looking locations. The piece also ties in with the exam brief because it is a key part in the meeting or pirates and treasure. I developed this map over a period of time throughout the exam, this can be seen in the 'Final Piece Processes' post where I have done a page of drawings and then a second because once I had put all of the drawings onto my map it didn't look busy enough so I had to draw some more.
Subscribe to:
Comments (Atom)